Info note
How to fix PD 3950 USB to P-NET Interface installation failure on Windows 8.1
64-bit and 32-bit editions of Windows 8.1 require digitally signed drivers. The PD 3950 driver doesn’t yet contain a valid Windows 8.x digital signature and the driver must therefore be installed as an unsigned driver. We’ll here show you how to install the driver regardless of the Windows version. The PC used is running 64-bit OS. Similar explanations can be found on the web.
If the PD 3950 USB to P-NET Interface is not installed properly, it is shown in the Device Manager as well as by the fact that none of the LEDs of the interface module are lit. In case you are facing this kind of problems, the following temporary procedure can solve the issue.
As soon as Windows has enumerated the PD 3950 USB Interface, it will be displayed in the Device Manager. When the PD 3950 is disconnected, the USB device will be removed from the list.
When this error occurs in Windows 8.1, the PD 3950 is shown in the section “Other devices”, which is not correct.
Before you start, the file PD3950.inf must be made accessible. The most convenient method is to copy the PD3950.inf provided by PROCES-DATA to the Desktop.
1.How to open PC settings
Point to the lower-right corner of the screen, which will lead to the following options:
2. Change PC settings
Move the mouse pointer up, click Settings, and then click Change PC settings:
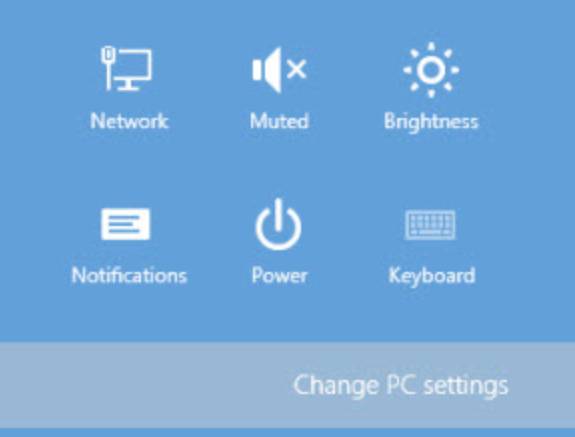
Choose Update and recovery from the list of options of the PC settings window that appears.
3. Choose Troubleshoot
Choose Restart now in the Advanced startup menu, which appears under the option Recovery.
Choose Troubleshoot:

4. Choose Restart now
Choose Advanced options:

Choose Startup settings, which inform you about the options that can be changed. Click Restart.
Startup settings offers nine different options, of which you must choose number 7, Disable driver signature enforcement. Choose this option by means of the key “7” or function key F7.
Windows now apparently starts in normal mode. However, this is a special mode that allows you to install unsigned drivers.
5. Device Manager
Right-click the Windows icon and select Device Manager:
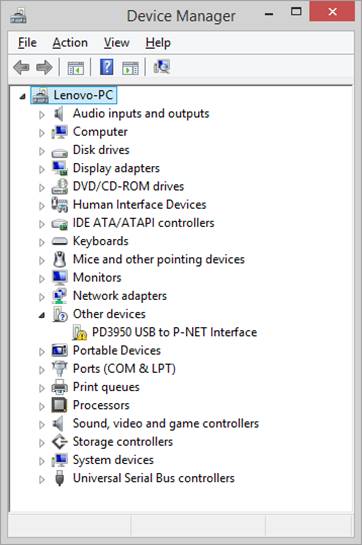
Right-click the PD 3950 device with the yellow exclamation mark and select Update Driver Software.
6. Update driver Software
Select the option Browse my computer for driver software:
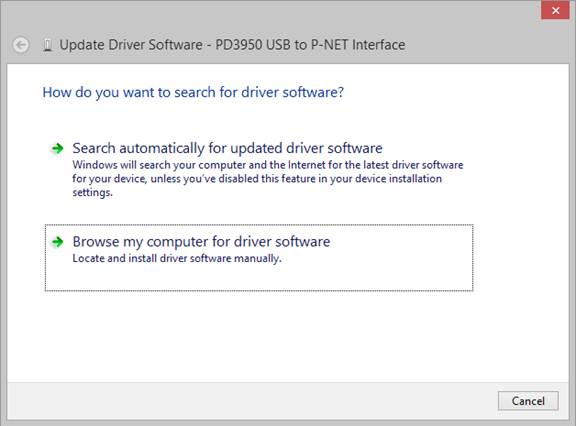
Browse for driver software on your computer
Select the option Let me pick from a list of device drivers on my computer (not the button Next):
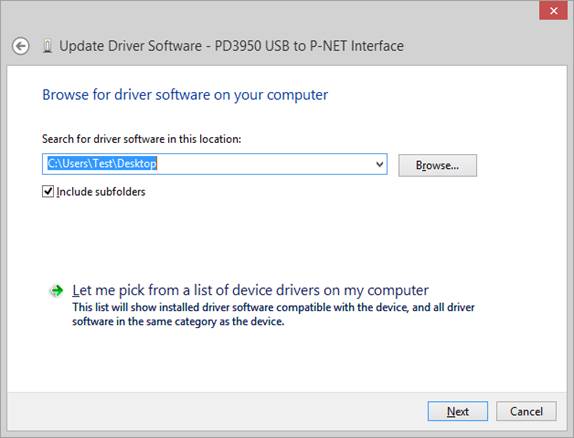
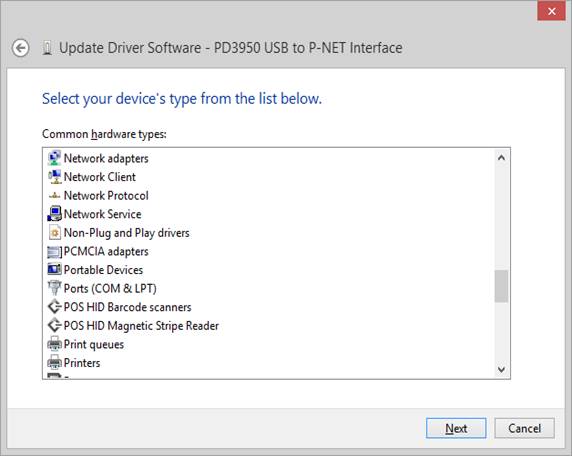
In the list of common hardware types, scroll down to Ports (COM & LPT) and click Next:
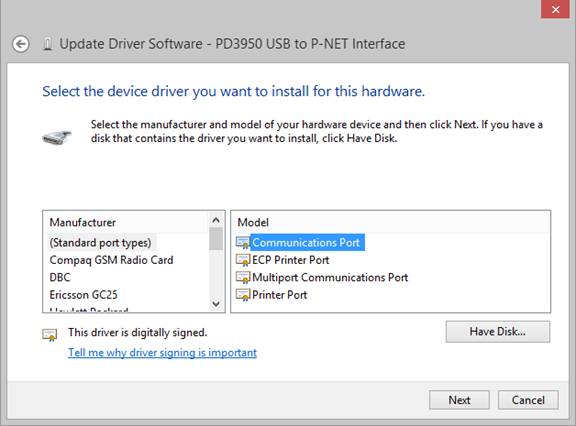
Choose Communications Port and the option Have Disk:
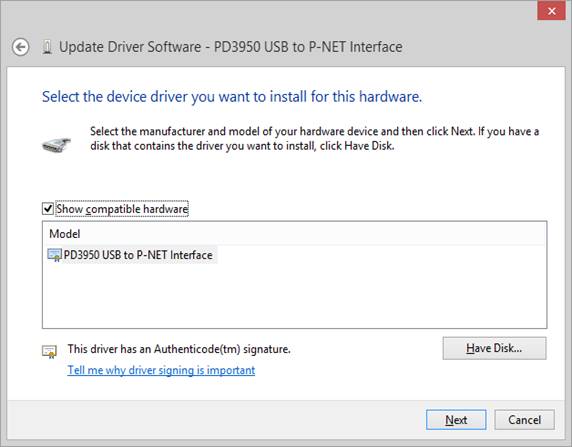
Choose the option Have Disk:
The default path is A:\ as illustrated:
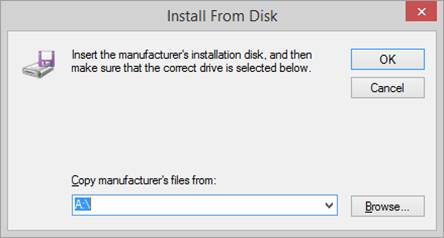
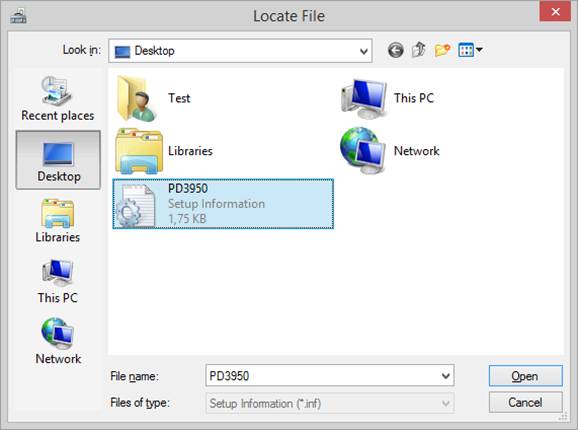
Use Browse to select the path where your PD3950.inf is located. In this example the file is located on the desktop. Once you have found it, select the file and click Open:
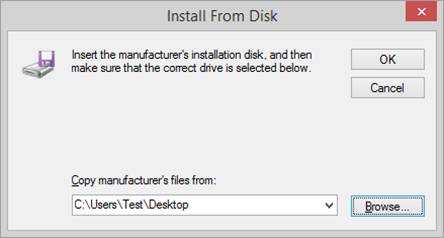
The configuration program now returns to the previous screen. Choose OK:
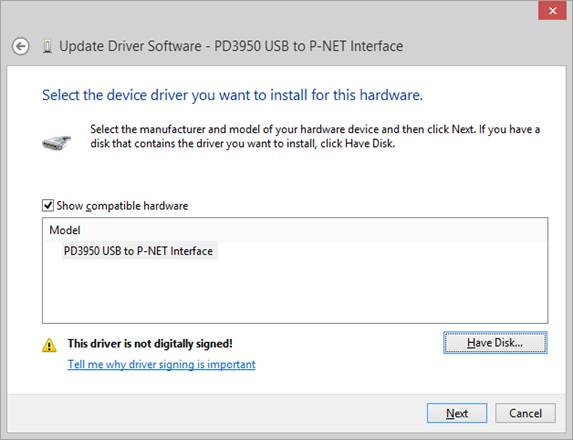
Even though it is indicated that the driver is not digitally signed, this time choose Next:
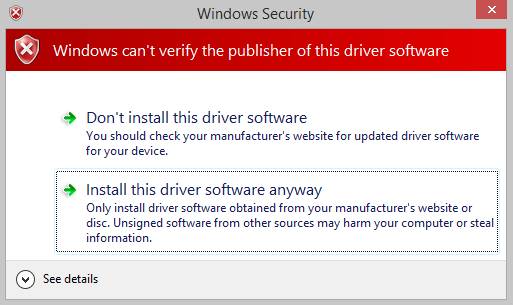
Choose the second option Install this driver software anyway:
After a few seconds the PD 3950 will be communicating, and the following message appears:
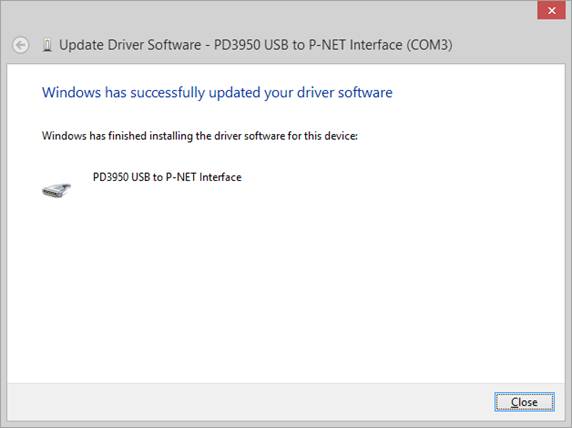
Click Close, whereupon the setup procedure automatically returns to Device Manager. What is different from previously is that the device PD 3950 now has changed its status as well as location from Other devices (with an exclamation mark), to Ports (COM & LPT) without indicating any errors:
7. Device Manager - succesful installation
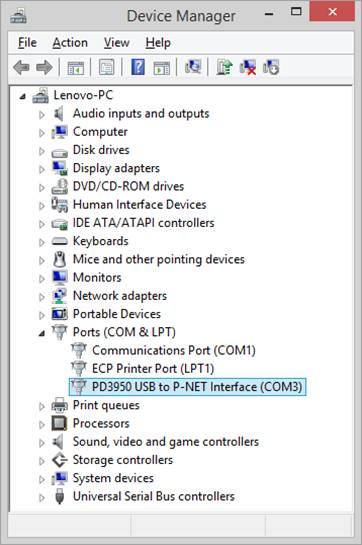
After successful installation of the device driver and when Windows has enumerated the PD 3950 USB Interface, the state of the LEDs switches to:
“On” (green) is illuminated, the “Link” (green) is flashing and the “Error” (red) is turned off.
8. Set P-NET Node Address in VIGO
From within VIGO, the PD 3950 can now as usually be addressed by the use of Set P-NET Node address.
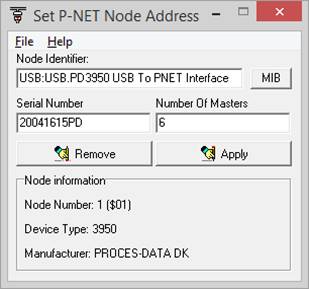
The workaround for this driver signature problem is permanent, i.e. also after the computer has been switched off and on again.


